Parallel Port Disk Drive for CPM using ESP32 and SD Card


This project implements a multiple 8MB disk system for CPM interfaced through a parallel port on an IMSAI MIO card. The device also includes a real time clock module that provides CPM with access to time and date. The project was conceived when I received a box of S100 cards but nothing that could support mass storage. It is not a fast I/O system, the data throughput is probably close to a floppy disk system, without the wait times for disk seeks. (I do miss the noises a floppy system makes!) The system has been exercised with quite a lot of code development on the Z80 system including compiling basic from sources, morse code practice programs, memory test programs and various editors and other system utilities. The configuration I am using now has 2 8Mb disk images stored on a micro SD card that contains a non banked version of CPM3 and just about every compiler, editor, utility and game I could find on the internet CPM archives. The system is powered from 5 volts available on the parallel port edge connector of the Imsai MIO card.

This is a complicated project. To get it working, an understanding of: Kicad PCB design and PCB production, parallel port interfacing, Arduino IDE projects for the ESP32, micro SD card interfacing, the CPM3 boot process (eprom, to boot loader to bios and disk configuration). In all, it took about 4 months of time, reverse engineering S100 bus hardware, debugging hardware, writing code, and figuring out the low level systems of CPM3. Since it was completed, it has operated without any known file corruptions or SD card card file system errors.
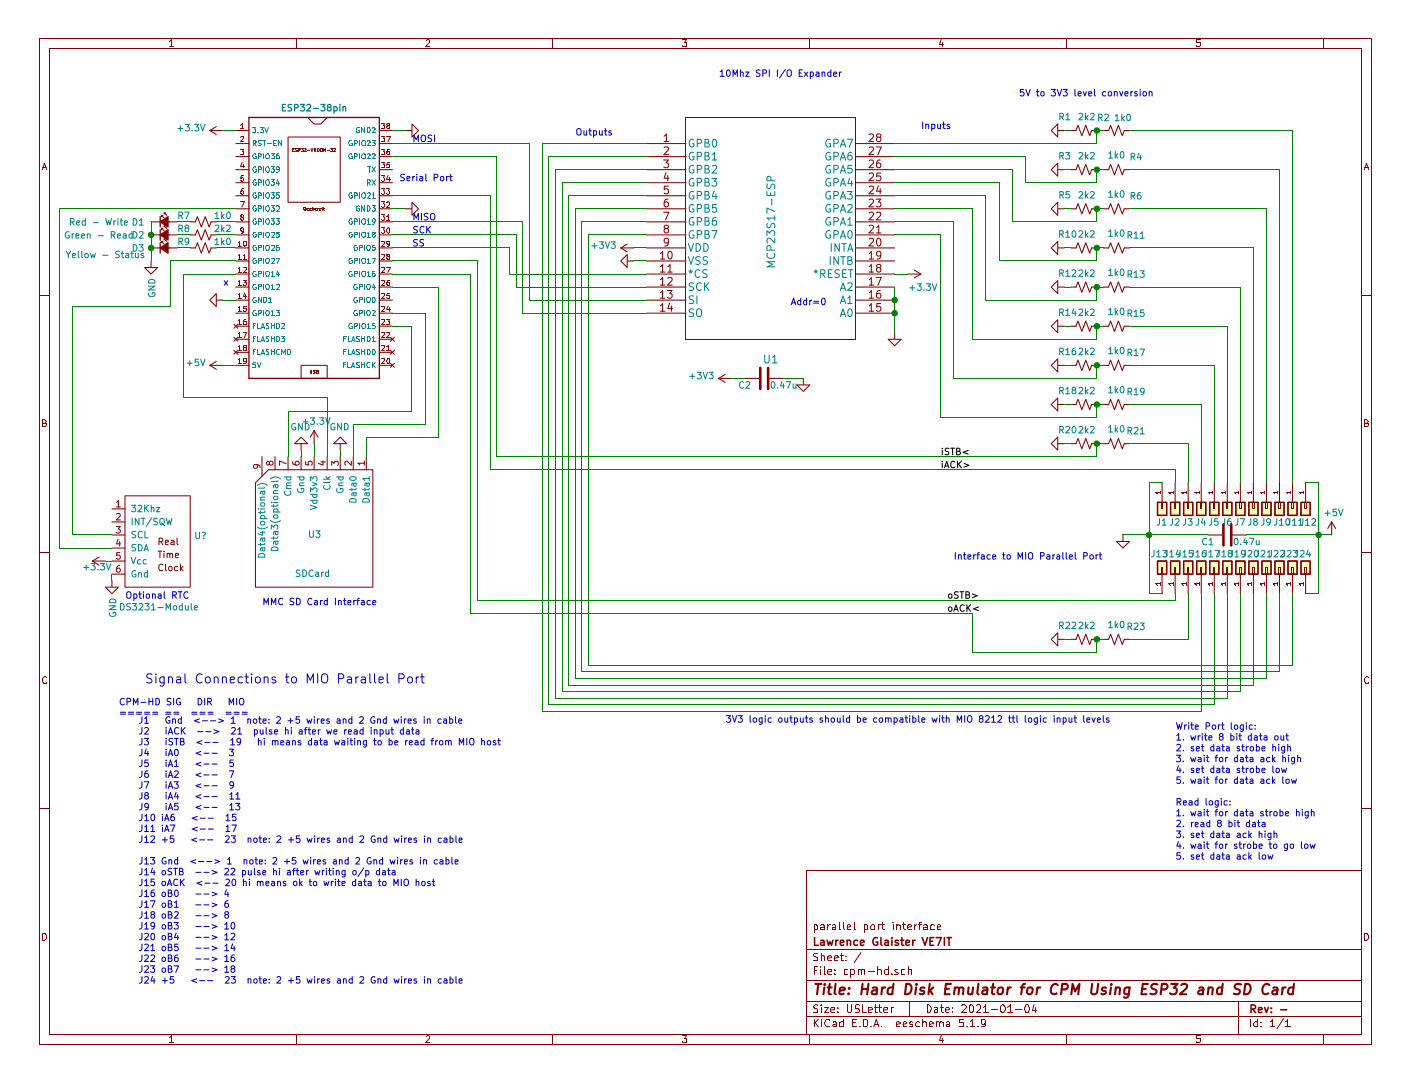
The system uses a bidirectional 8 bit parallel port (two 8212 ICs on the Imsai MIO)
to talk through a cable to
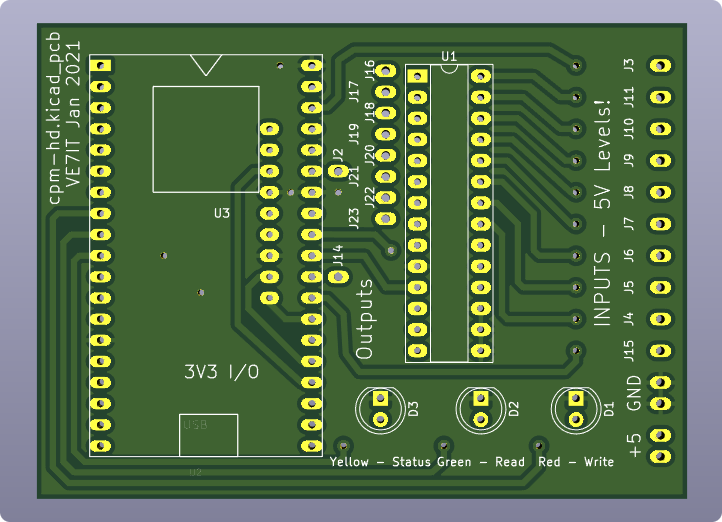
the ESP32 card which has an SD card slot, several status LEDs and an DS3231
RTC clock chip. The interface protocol is a very simple challenge, response
model with 5 commands.
- read 512 byte sector on disk N
- write 512 byte sector on disk N
- echo a byte (for a loop back communication test)
- read time (CPM3 internal time structure)
- set time (CPM3 internal time structure)
As far as the ESP32 is concerned, each HD image is a fixed size binary file
on the micro SD card FAT file system. When the CPM system wants to write or read a sector,
the file for the requested drive image is opened, a seek to the sector offset
is performed and 512 bytes of data is read or written and the file is closed.
The data transfers over the parallel port are checksumed and also have timeouts
that prevent system hangs. The USB port on the ESP32 is used for programming the
firmware and also as a serial port with debug information displayed during operation.
During normal use, nothing is connected to the USB port. The ESP32 code is written in
the Arduino IDE version of C/C++, while the rest of the interface code on the CPM
side is written in 8080 or Z80 assembler. In the current ESP32 software, if there is any
problem with communications or file access, the ESP32 flashes the yellow status
led and inhibits any more transactions until power cycled (this has only been observed
during testing where various problems were simulated).

One unique idea I found on the internet was using a micro sd to sd card adapter as an interface between the micro SD card and the ESP32. The adapters come with just about every micro SD card and can be put to use as I did in this project. By soldering a few wires onto the adapter and hooking up to certain ESP32 pins, one has a cheap SD_MMC to micro SD adapter. Using the SD_MMC interface is faster than using SPI, and is fully supported in either 1 bit or 4 bit data paths. There was very little speed difference between the 4 bit and 1 bit interface, so I elected to use the one bit interface to save on wiring and ESP32 pins.
There were several steps needed to bring this solid state hard drive online. Building the hardware was the easy part. Configuring the MIO parallel port took some time to get the status pins and strobes figured out. Routines ( read byte, write byte, and a loop back test) were written into the eprom system monitor to help with the hardware interfacing. Writing the ESP32 program was a little easier as it was all done in C/C++ and was quickly downloadable into the ESP32 flash memory. The next part of the process is getting a CPM bootloader written and getting the sector in/out routines into the CPM Bios sources. This development work was done on a linux PC using the SIMH altair Z80 simulator. It is pretty exciting to see the LEDs flash when one hits the 'B' (Boot) command in the monitor and watch as sectors are loaded into memory and executed and the CPM prompt flashes up on the screen. If you already have a cpm system booting from floppy, adding the disk configuration and the sector read and write routines into your bios should not remove too much hair.
This section has some details on the disk image format used.
The linux utilities package "cpmtools" was used for reading and writing the CPM file format
images on the linux machine. The HD format used is 256 tracks of 64
sectors of 512 bytes/sector ( a total of 256*64*512 = 8,388,608 bytes ).
I used a small shell file to collect info to be placed on the hard drive
images (see Build_PP-imgs.sh below). Cpmtools requires a definition of the
harddrive format I call s100ide. It is defined in the file diskdefs included below.
diskdef s100ide
  seclen 512
  tracks 256
  sectrk 64
  blocksize 2048
  maxdir 1024
  skew 0
  boottrk 1
  os 3
end
